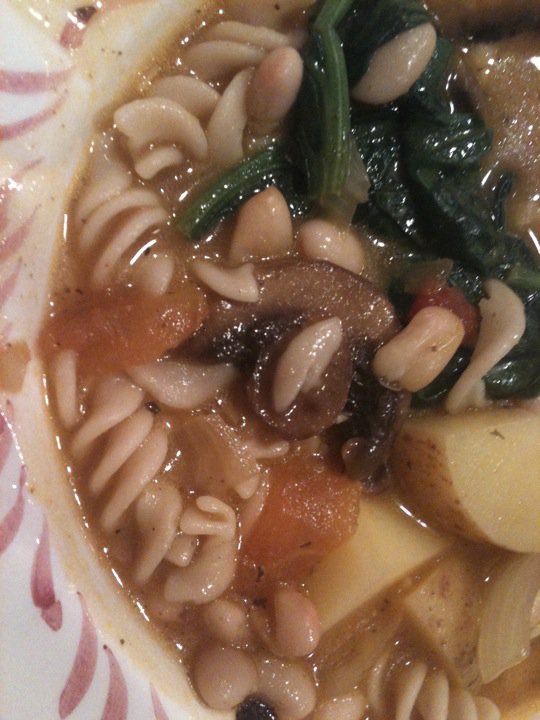
Yo-yoing weather, early morning work-outs, and an upcoming move into our new house has left me with pretty pooped! When I am constantly whiplashed from one thing to the next, I turn to comfort in the kitchen and sink into the calming coma of fresh herbs, rich olive oil, and garlic.
I love coming home from a long day at work and cooking meals with my husband. Even if by cooking I mean sitting with a glass of red wine and a smile while my husband helps by prep. Team work right?
This pasta cozies up to the fresh vegetables perfectly to your tummy on a brisk fall evening. My son had two helpings and was begging for more of the mushrooms. He said they tasted like the “fire place mushrooms” (his favorite hibachi grill restaurant). Food that warms my soul and a child's words that warm my heart.
Perfectly Simple Pasta
Ingredients
• 3 cups Brown Rice Pasta (I used Tinkanyada)
• 2 cups spinach
• 1.5 cups crimini mushrooms
• Extra Virgin Olive Oil
• Vegetable Broth (I used Pacific Low Sodium)
• 1 cup cherry tomatoes
• ¼ cup pasta sauce
• Italian seasoning
• ¼ cup basil leaves
• 1 clove garlic, minced
Directions
Prepare your pasta according to the package and set aside. I cooked mine in vegetable broth for extra flavor.
Heat the olive oil in a medium sauce pan and add garlic. When you begin to smell the garlic aroma add your mushrooms and stir to coat. The mushrooms should soften after about 7 minutes. Add a heavy amount of Italian seasoning and stir. Turn your heat down to low and add cherry tomatoes, basil, sauce and spinach. Toss to combine and let warm for a couple minutes.
Remove from the heat and add to your pasta. Toss and Serve!
Showing posts with label vegan. Show all posts
Wednesday, September 14, 2011
Tuesday, September 6, 2011
Indie's Insalata
![]() |
| I only got pictures before the dressing and seasoning as I prepped early! |
Labor Day weekend is always jam packed and bursting to the brim with family fun affairs. We fit in as much as possible which usually leaves me pretty run down by the end. Hence the short post and sheer lack of writing creativity in today which I do apologize.
A bit of recap event that I must share because it involved the food highlight of my weekend was Saturday night’s family rendezvous over pizza and football. My alma mater TU played OU and we had my husband’s side of the family over to my in-laws to take in the game. The menu? Pizza, a fare that used to make me faint because I may be limited to my options. But no fear my dear, since Tulsa now has a few pizzerias offering kind pizza to gluten free tummies, I was able to stuff myself not just with new family on-goings but also a delicious homemade Italian style salad and a few slices of pie. Pizza pie that is of course! We ordered out from Hideaway pizza who most recently adopted gluten free pizza options on their menu! I won’t have to shy away from Hideaway anymore! Honestly now, who can resist their enormous choices of toppings and combinations?!
My mother in law asked me to make a salad for the meal and I decided it was only fitting to make it Italian. Pizza…Italian salad…see the dotted line connection….It was scrumptious and received many compliments from the fam! I didn’t mind
Alas, my college team didn’t win. However, this salad is most certainly a winner and will be repeated! Add any protein and you could easily make a meal out it. The following recipe was made to satisfy a crowd so it is quite large, but you could always half it if you aren’t entertaining a country like I was on Saturday!
Indie’s Insalata
• 1 can artichokes, drained and rinsed
• 1 can sliced pepperoncinis, drained and rinsed
• 1 package of fresh cherry tomatoes• 4 tbs Italian seasoning
• ½ cup sliced black olives (optional)• Italian dressing, store bought or use the homemade one below!
Toss first 5 ingredients together in a large salad bowl. Add dressing right before serving.
Italian Dressing
adpated slightly from All Recipes
• ¼ cup fresh basil leaves
• 1-1/2 teaspoons garlic salt
• 1-1/2 teaspoons onion powder
• 1-2 tablespoon dried oregano
• 1 teaspoon ground black pepper
• 1 teaspoon dried thyme
• 1teaspoons dried parsley
• 1 tablespoon salt
• 2 cloves fresh garlic
Place all ingredients into a blender, vitamix, or food processor and blend until smooth!
Monday, August 15, 2011
Meredith's Monster Cookies
Last Friday night brought a dinner party with close friends, pleasant patio weather, and delectable dishes. We enjoyed an easy menu of Greek salad, pizza, wine, and my contribution, dessert! I have been dying to try a cookie recipe that my cousin Meredith sent to me last week, and this was the perfect chance to whip up a batch. They sounded so naturally scrumptious, and I wouldn’t have to tweak the recipe to make it gluten free. Less work, more flavor? I am there!
The only thing I needed to change was the enormity of a recipe name: Sugar-Free, Egg-Free Peanut Butter & Banana Chocolate Chunk Cookies. That simply wouldn’t do. I think this dessert deserves a decent name, one that gives credit where credit is due too. Meredith’s Monster Cookies is a bit sweeter, and you won’t go blue in the face trying to say it with one breath!
I made mine with vegan semi-sweet chocolate that I had on hand but you can use whatever your little chocoholic heart desires. The result? They turned out to have the perfect cookie texture, a crunchy outer shell and a burst of gooey smoothness in the center. I attribute it to the banana that I pureed instead of mashing. I didn’t want chunks of banana, but rather a banana flavor. I was tempted to throw a flax egg in the mix because the dough was pretty soft but they held together nicely. Loads of lip smacking goodness is packed into tasty treats!
Thanks Meredith for sharing this recipe with me. It will definitely be on my cookie recipe hotlist!
Meredith’s MONSTER Cookies
Ingredients
· 3 large, ripe bananas
· 1/2 cup peanut butter, preferably all-natural
· 1/3 cup canola oil
· 1 tsp vanilla extract
· 2 cups old-fashioned oats
· 1 tsp baking powder
· 1/4 tsp cinnamon
· 1/4 tsp salt
· 1/2 – 1 cup semi-sweet vegan chocolate chips
Directions
Preheat oven to 350˚F.
Puree the bananas and put into a large bowl. Add your peanut butter, oil and vanilla. In another bowl stir together the oats, baking powder, cinnamon and salt. Add the dry ingredients to the wet ingredients along with the chocolate and stir until combined.
Drop spoonfuls of dough onto a baking sheet lined with parchment or coated with nonstick spray. I made the first batch a little bigger so I baked for almost 20 minutes. The second batch baked for about 16 minutes.You are looking for a rich golden brown color on the outside.
Remove and let cool. Sneak one or two to taste test…then serve!
Tuesday, July 26, 2011
Home Sweet Home...for Lunch
I have every other Friday off and take advantage fully. Starting with breakfast and lunch at home! I love cooking and baking all day, letting the aromas fill up the house. Of course, Fridays off do mean a lot of errands and laundry but there is some relaxing in there.
Fridays are also my last day of veggie supplies. I restock Saturday mornings at the farmers market so lunches are usually scattered with whatever I have left in the crisper. For last week’s meal that was daikon, a large head of broccoli, a small zucchini, half a yellow onion, and Portobello mushrooms. Brown rice in the cupboard. This would be easy and very doable. A little sautéing and soy sauce and a vegan “stir fry” would be in my bowl in no time!
I want to step back briefly though and talk about daikon. Daikon may be a new vegetable for some of you to see and I feel like I need to brag a little on this Japanese radish. I first heard of daikon through Alicia Silverstone’s “The Kind Diet” cookbook. She has some wonderful recipes and insight and I enjoy following her blog. Click here to read more about Alicia’s Kind Diet and Kind Life: http://www.thekindlife.com/There are plenty of pieces of literature on daikon but I thought Mitoku sited some wonderful benefits about this wonder radish:
“Raw daikon is used throughout Japan to complement the taste of oily or raw foods and, more importantly, to aid in their digestion. Laboratory analysis has shown that the juice of raw daikon is abundant in digestive enzymes similar to those found in the human digestive tract. These enzymes - diastase, amylase, and esterase - help transform complex carbohydrates, fats, and proteins into their readily assimilable components. Traditional Japanese restaurants serve grated daikon (daikon oroshi) in tempura dip to help digest oils, or shredded daikon with raw fish to help digest the protein. Grated daikon is a wonderful aid to people with a weak digestive system. It is important, however, to use grated daikon immediately. In just thirty minutes nearly 50 percent of its enzymes are lost.
Daikon is high in vitamin C and folacin. Like its relatives broccoli, cabbage and kale, daikon is a cruciferous vegetable that offers cancer-protecting potential.
A few drops of soy sauce and a tablespoon of grated daikon is a macrobiotic treatment for helping the body discharge old animal protein and fats. Cooking daikon with a kombu broth is said to help the body eliminate excess dairy products. A tea brewed from daikon, shiitake and kombu has been used as a folk remedy to reduce fever.”
Not only am I interested in any little help to aid with digestion, I am also interested in taste! Daikon can be prepared in so many ways and I find it absolutely delicious. They are very large so don’t be shocked when you put them in your basket at the grocery store!
Back to the big bowl of yummy veggies. I think you will find this recipe so simple to throw together, and feel free to switch out your vegetables!
Sautéed Veggies & Rice
(serves 2 hungry lunchers!)
• 1 head of broccoli, cut into florets and steamed
• 1 half yellow onion, cut into moons• ¾ daikon, sliced
• 1 Portobello mushroom, sliced lengthwise
• 1 small zucchini, half mooned
• 2 tbs tamari (gluten free soy sauce)• ½ tsp red pepper flakes (optional)
• 2 tbs canola oil or Earth Balance
• 1 clove fresh garlic, minced
• Kosher salt and black pepper to taste• 1 cup cooked brown rice
In a large sauce pan heat oil and add garlic. Once you can smell the garlic, add onion and coat in oil. Sauté until translucent and starting to caramelize, about 7-10 minutes. Add daikon, mushroom, zucchini and broccoli and combine. Add spices and soy sauce and sauté for another 7-10 minutes, depending on how soft you like your veggies.
Place half cup of brown rice in 2 bowls. Top with vegetables and serve! You can add tofu or other protein if desired.
Thursday, July 14, 2011
Kitchen Poker Face
I love a good sandwich. There is just something perfect about how you can make converse flavors and textures melt together, tweaking a common known recipe into your own original plated perfection. An email I received yesterday from one of the recipe sites I follow boasted a bundle of “dinner worthy” sandwich recipes to try. As I clicked and became carried away with the mouthwatering, eye-catching icons, I realized I haven’t made a sandwich in a while. I used to express deep devotion to my Panini press, concocting all sorts of beautiful flavors between two slices of bread. Well, I am back in the game, and playing some wild cards in this round of cooking poker.
1. Crunchy, cheesy toasted bread
2. Juicy, ripe, thick tomato slice
3. Crispy, light lettuce
4. ‘Special Sauce’ (mustard, mayo…something mixed)
5. And of course, the ace, thick sliced bacon
But, like I said, I am introducing some new rules to the game. I am not going to settle for traditional approaches. My “BLT” wouldn’t feature most of the natural go-to fixin’s: meat, cheese, egg, lettuce, mayo. Yes, I dealt a hand last night that beat the BLT god’s odds against me.
1. Gluten Free Bread (cheesy and buttery a la vegan)
2. Juicy, ripe, thick tomato slice (for old times sake)
3. Fresh, locally grown spinach (more nutrients!)
4. Dijon Mustard (mayo wha?)
5. FACON
| V-BLT. Looks heavenly doesn't it?! |
A risky move. Especially with such a long standing traditional recipe. I’ll think you’ll love this non-conformist BLT though, or rather FST? I know I should call a spade a spade but for reader’s sake, let’s try…V-BLT. A vegan BLT. Rolls off the tongue a bit nicer.
V-BLT
Yields 2 sandwiches
Ingredients
• 4 slices gluten free bread of choice
• ½ package extra firm tofu
• 2 tbs low sodium Tamari (gluten free soy sauce)
• 1 tbs Daddy Hinkle’s gluten free marinade OR liquid smoke
• Pepper
• Earth balance butter
• 2-3 tbs nutritional yeast (optional)
• 2 thick slices organic tomato
• ½ cup to 1 cup locally grown spinach
• Dijon Mustard
• PAM EVOO spray (if using griddle)
Directions
Heat oven to 400 degrees F. Place 4 slices of bread on a greased baking sheet. Lightly spread earth balances on pieces then sprinkle nutritional yeast evenly until all coated. (Omit yeast if preferred but it gives it a cheesy taste). Bake for 10 minutes, flip, and then another 10. My oven can be temperamental so I just watch for browning. Remove and set aside to cool.
While your bread is toasting, press your tofu and slice thinly lengthwise. I came out with about 6 slices. Place in a bowl and add tamari, daddy hinkles, and pepper. Let marinate for about 10 minutes.
Heat a sauce pan with 1 tbs earth balance. Dry off your tofu and add to the pan. Brown on both sides until crispy like bacon!!
Heat your griddle to 350 F and lightly grease. You can use a large pan if you prefer, or Panini press. I wanted mine piled high so I opted for the griddle. Lay down your slices of bread and begin layering. On 2 slices layer spinach, tofu, and tomato. Drizzle Dijon on the other two slices and place it on top of your layered slice, pressing down slightly with your spatula. Flip (carefully) after about 3-4 minutes. You just want everything to combine and warm together.
Plate and serve! I made kale chips on the side. Haven’t tried them? Oh, you don’t know what you are missing! Here is quick recipe below. I have my whole family hooked!
Oh, and in case you were wondering, this was the most perfect "BLT" I have ever eaten. The bread was crispy and buttery and housed the most amazing flavors. The Facon? Perfection. Even my husband didn't want to come up for air between bites. This version also cuts a whole lotta calories, another win I would say. V-BLT just earned itself a weekly spot on the week's menu!
Kale Chips
Ingredients
• 1 bunch curly kale, stems removed
• 1 tbs olive oil
• Seasoning of choice
o Sea salt and pepper
o Cajun
o Nutritional yeast for cheesy chips
Directions
Heat oven to 425 F. Tear leaves off the stems into small pieces and place in a large bowl. Add olive oil and massage into kale. Lay on a lighted greased baking sheet with none of them touching. Add preferred seasoning. Bake for about 10-15 minutes or until edges begin to brown.
Plate and serve. My advice, get your hands on some before serving…they go FAST!
Wednesday, June 22, 2011
Thinking Green
Green monsters. You’ve seen me mention them. You’ve maybe seen them uploaded on my blog’s facebook page. But, I have never really gone too in depth into them.
Angela Libbon from Oh She Glows started the “Green Monster Movement” and it has been catching on like crazy! I have seen so many different ways people have taken this simple recipe/idea and turn it into fabulous and delicious concoctions. Green smoothies made with a healthy dose of spinach or kale, and all sorts of different fruit and mix ins, depending on your mood. These fresh, healthy, energy boosting delights have me addicted! When I am feeling low on energy or have just finished a grueling 5 am work out, I blend up one of these babies and BAM! instant bliss.
Check out her movement here! Green Monster Movement
Mango Green Goblin
Ingredients:
• organic mango, diced (or use frozen chunks if you don’t have fresh)
• 1 cup almond milk
• 1 tsp organic vanilla
• 2-3 large handfuls fresh organic spinach
• 2-3 ice cubes
Directions:
Combine all ingredients but ice into your food processor and pulse until smooth. Turn ‘on’ and add ice one cube at a time until crushed. Pour and enjoy!
Angela Libbon from Oh She Glows started the “Green Monster Movement” and it has been catching on like crazy! I have seen so many different ways people have taken this simple recipe/idea and turn it into fabulous and delicious concoctions. Green smoothies made with a healthy dose of spinach or kale, and all sorts of different fruit and mix ins, depending on your mood. These fresh, healthy, energy boosting delights have me addicted! When I am feeling low on energy or have just finished a grueling 5 am work out, I blend up one of these babies and BAM! instant bliss.
Check out her movement here! Green Monster Movement
I love putting in frozen bananas because it tastes like creamy ice cream! Sometimes I don't have time to freeze them or I am wanting something outside of a banana flavor though so I omit. My recent obsession: MANGOS! Here is one of my recent green mango machines. After a bit of a rough night, my husband and I needed a little pep in our step. This was just the ticket.
Oh, and consider me hooked on the green monster movement! You will see a lot more versions from this Indie! Please feel free to share yours so I can try! :)
Mango Green Goblin
Ingredients:
• organic mango, diced (or use frozen chunks if you don’t have fresh)
• 1 cup almond milk
• 1 tsp organic vanilla
• 2-3 large handfuls fresh organic spinach
• 2-3 ice cubes
Directions:
Combine all ingredients but ice into your food processor and pulse until smooth. Turn ‘on’ and add ice one cube at a time until crushed. Pour and enjoy!
Tuesday, June 14, 2011
"this is the way I eat my Peanut Butter Cup..."
I don’t have a big sweet tooth but I love putting together desserts. Baking is getting easier each time (minus the occasional GF monster surprise) and I love the smiles I get from my loyal family taste testers.
Lately I have been obsessed with looking at vegan and raw desserts online. I find no bake sweets fascinating and quite frankly a big relief when I don’t have to pray and dutifully check my oven window every 5 minutes. Some of my recent favorites have been frozen banana soft serve, cookie dough “blizzards”, and cookie dough balls dipped in chocolate. I know what you are thinking, “Didn’t she JUST saw that she didn’t have a sweet tooth?” Well, these desserts are not only GF and no bake, but they are also vegan and healthier for you. Plus, the recipes make small portions. Hey, I know it's bikini season but we are still allowed to treat ourselves every once in a while…
Last night I tested out a peanut butter cup recipe I found on http://www.loveveggiesandyoga.com/. I love Averie’s cooking because it is simple, healthy, and kid friendly. Her daughter gobbles up her healthy vegan goodies with no complaints! I was a big Reeses peanut butter cup fan in the past so I thought it would be fun to try. It was probably the easiest dessert I have ever made! No food processor, no baking, no fuss, and no long list of ingredients. In fact, I had everything in my kitchen pantry! I have been keeping vegan chocolate chips or karob chips around for my chocolate chip cookie dough ball obsession (recipe to come!).
I of course added a couple things to the recipe but feel free to play around with it to your own taste buds desire! You can find her original recipe here: Averie's Raw Vegan 10 Minute Peanut Butter Cups
These make 2 good size cups. I don’t know about you but if it’s in front of me I will eat it so I prepared portion controlled cups!
Vegan 10 Minute Peanut Butter Cups
Ingredients
• ½ cup vegan chocolate (I used vegan chocolate chips)
• 2 tsp nutritional yeast
• 2 tablespoons organic creamy peanut butter
• 2 tsp agave nectar
• Pinch kosher salt
• 2 tsp organic pure vanilla extract
Directions
Melt ¼ cup of the chocolate in the microwave (about a minute). Fill the bottom of 2 muffin liners evenly with the melted chocolate. The muffin liners give it the rippled edges like a real reeses.
Mix together peanut butter, honey, yeast, salt and vanilla. If your yeast isn’t mixed well you can microwave it for about 10 seconds. Spoon desired dollop onto the semi hardened chocolate base.
Melt the remaining chocolate and pour evenly over the peanut butter. Put into the refrigerator for at least 10 minutes.
Peel wrapper and enjoy! They are pretty rich so one was plenty for me and my husband. I am sure you can make big batches though pretty easily. I see party ideas in the future!
Lately I have been obsessed with looking at vegan and raw desserts online. I find no bake sweets fascinating and quite frankly a big relief when I don’t have to pray and dutifully check my oven window every 5 minutes. Some of my recent favorites have been frozen banana soft serve, cookie dough “blizzards”, and cookie dough balls dipped in chocolate. I know what you are thinking, “Didn’t she JUST saw that she didn’t have a sweet tooth?” Well, these desserts are not only GF and no bake, but they are also vegan and healthier for you. Plus, the recipes make small portions. Hey, I know it's bikini season but we are still allowed to treat ourselves every once in a while…
![]() |
| I had to show a lot of restraint to get a photo... |
I of course added a couple things to the recipe but feel free to play around with it to your own taste buds desire! You can find her original recipe here: Averie's Raw Vegan 10 Minute Peanut Butter Cups
These make 2 good size cups. I don’t know about you but if it’s in front of me I will eat it so I prepared portion controlled cups!
Vegan 10 Minute Peanut Butter Cups
Ingredients
![]() |
| Rich Peanut Butter Goodness! |
• 2 tsp nutritional yeast
• 2 tablespoons organic creamy peanut butter
• 2 tsp agave nectar
• Pinch kosher salt
• 2 tsp organic pure vanilla extract
Directions
Melt ¼ cup of the chocolate in the microwave (about a minute). Fill the bottom of 2 muffin liners evenly with the melted chocolate. The muffin liners give it the rippled edges like a real reeses.
Mix together peanut butter, honey, yeast, salt and vanilla. If your yeast isn’t mixed well you can microwave it for about 10 seconds. Spoon desired dollop onto the semi hardened chocolate base.
Melt the remaining chocolate and pour evenly over the peanut butter. Put into the refrigerator for at least 10 minutes.
Peel wrapper and enjoy! They are pretty rich so one was plenty for me and my husband. I am sure you can make big batches though pretty easily. I see party ideas in the future!
Labels:
celiac,
dessert,
entertaining,
gluten free,
vegan,
vegan dessert
Wednesday, June 1, 2011
Ri Le's- A Vietnamese and Vegan Awakening
I used to visit Ri Le’s with my family all the time as a little girl. I must confess, and I shame myself (as does my tummy and taste buds) that I hadn’t visited this establishment in probably four years. My dear readers and fellow restaurant connoisseurs, it was only punishment to myself and I have no excuse but that possibly I grew senile and forgot to visit. Can one be senile in their 20s? All I know is that I knew I had to have it. A craving that grew so strong I had to scrape the internet to find a menu. You know me and my cravings…they are sharp and specific. Nothing else would cure this Indie’s craving.
Pronounced Ree-lay’s, this Tulsa landmark definitely isn’t shy about relaying boastful dishes to our local community. Thirty years ago, Ri Le and his wife Thao opened their first small Vietnamese restaurant in Tulsa and have been dishing out healthy, flavorful food since it's opening1981. Oh and guess what? It’s definitely a vegetable lover’s heaven. The owner himself is vegan and prides himself on preparing healthy dishes. That is my kind of restaurant owner!
Was it worth the four year wait before coming back? Honestly, yes. Now, before you get your noodles all in a bunch let me explain why. It was a whole new experience, or maybe a strange new awakening. I had a deeper appreciation of his dishes and was delighted by my menu choice.
I found their menu on urbanspoon and happily browsed the long list of vegetarian and vegan options. Hmmm… vege tofu. That sounded about right. I had them make it the “soy” option which means it was prepared to the textures of how the meat is served versus cubed or sliced tofu. You have to ask for it to be prepared like this specially but he doesn’t mind! Not knocking eating tofu in shapes but sometimes you gotta change it up right? They were great about cooking the dish for a gluten free diner too.
It was delicious fellow Tulsans and visitors. BETTER than I remember.The vegetables were spicy, tangy, and crunched perfectly against the silky smooth texture of the delicate tofu. The rice soaked up the sauce and I felt myself melt into my seat. I have a feeling that these cravings will come more consistently now. In fact, just typing about it makes me want to pick up the phone…
Pronounced Ree-lay’s, this Tulsa landmark definitely isn’t shy about relaying boastful dishes to our local community. Thirty years ago, Ri Le and his wife Thao opened their first small Vietnamese restaurant in Tulsa and have been dishing out healthy, flavorful food since it's opening1981. Oh and guess what? It’s definitely a vegetable lover’s heaven. The owner himself is vegan and prides himself on preparing healthy dishes. That is my kind of restaurant owner!
Was it worth the four year wait before coming back? Honestly, yes. Now, before you get your noodles all in a bunch let me explain why. It was a whole new experience, or maybe a strange new awakening. I had a deeper appreciation of his dishes and was delighted by my menu choice.
I found their menu on urbanspoon and happily browsed the long list of vegetarian and vegan options. Hmmm… vege tofu. That sounded about right. I had them make it the “soy” option which means it was prepared to the textures of how the meat is served versus cubed or sliced tofu. You have to ask for it to be prepared like this specially but he doesn’t mind! Not knocking eating tofu in shapes but sometimes you gotta change it up right? They were great about cooking the dish for a gluten free diner too.
It was delicious fellow Tulsans and visitors. BETTER than I remember.The vegetables were spicy, tangy, and crunched perfectly against the silky smooth texture of the delicate tofu. The rice soaked up the sauce and I felt myself melt into my seat. I have a feeling that these cravings will come more consistently now. In fact, just typing about it makes me want to pick up the phone…
Ri Le’s Location:
4932 E 91st St
Tulsa, OK 74137
(918) 496-2126
Friday, May 27, 2011
Say CHEEEEZE!
Vegan ‘Cheeze’ Sauce. Hmmm. A recipe worth tackling. Worth Tweaking. Worth Trying. Trust me. Nutritional Yeast and I have become practically besties over the last few weeks so I thought it was about time to break out the big guns. I have tried the faux blocks of cheese and while they taste decent at best, I am not the biggest fan. Maybe I need to try it in different recipes. I just hate the idea of eating something so processed especially when I know there is a recipe out there I can try.
I came home from my golf lesson the other night to find that my boys had taken it upon themselves to order pizza. The smells emanating from the box threw me into a pizza craving fit. Luckily I knew I had a leftover Rudi’s pizza crust in the freezer! I would make my own pizza and I
would make it better than the saturated saucer in the take out box. I am calling a duel. ON GUARD!
Gluten Free/Dairy Free Caramelized Onion and Mushroom Medley Pizza
Ingredients
• One gluten free pizza crust
• ¾ cup marinara (I used a bell pepper, black olive classico one)
• ½ package organic mushroom medley (cremini, Portobello, shitake)
• 1 sweet onion, cut into half moons
• Pinch kosher salt
• Black pepper to taste
• Angela’s vegan cheeze sauce (see recipe below)
• Extra virgin olive oil
Instructions
Preheat your oven to 375 F. Place your gluten free pizza crust on a pizza baking sheet. Smooth marinara evenly, leaving a quarter inch of edge for your crust. Lightly brush olive oil on exposed edges.
In a sauté pan on medium high heat add 1 tbs of EVOO and toss your onions in to coat. Add a pinch of kosher salt and constantly sauté and turn your onions until they have begun to turn a dark brown color. It took me about 20 minutes. Add the mushrooms and toss until softened, about another 5 minutes. I added a little Cajun seasoning because quite frankly I am obsessed but that is optional!
Remove from heat and let cool for a few minutes. Begin your cheeze sauce (recipe below). After taste testing…twice over here with absolute delight!...top your pizza with the veggies and finally drizzle the sauce on top. I added a little black pepper on top.
Bake in the oven for about 10-12 minutes or until your crust is golden brown.
Serve with a smile and say CHEEZE!
Angela’s “Cheeze” Sauce
Ingredients• 3/4 cup raw cashews
• 1 cup non-dairy milk (I used unsweetened + unflavoured soy milk), or more to thin out
• 3 garlic cloves
• 1 tbsp fresh lemon juice
• 2 tsp kosher salt, or to taste
• 6-7 tbsp Nutritional yeast (provides the cheesy consistency)
• 1/2 tsp Dijon mustard
• 1/2 tsp or a bit more of dried Italian seasoning
• 1/4-1/2 tsp Tumeric powder, optional (gives the orangey color)
• Freshly ground black pepper, to taste
InstructionsAssemble your cheeze sauce ingredients (cashews, non-dairy milk, garlic, lemon, salt, nutritional yeast, pepper, mustard, seasonings) and add just the cashews to food processor. Process until a fine crumb forms similar to corn meal. Now add in the rest of the cheese sauce ingredients and process until smooth. Adjust seasonings to taste.
**This recipe is vegan except for the pizza crust which contains eggs.
I came home from my golf lesson the other night to find that my boys had taken it upon themselves to order pizza. The smells emanating from the box threw me into a pizza craving fit. Luckily I knew I had a leftover Rudi’s pizza crust in the freezer! I would make my own pizza and I
would make it better than the saturated saucer in the take out box. I am calling a duel. ON GUARD!
A veggie pizza was an easy choice, and I had some marinara in the fridge I could smear for the base. But there was the question of cheese. I have baked with soy cheese in the past and it honestly didn’t provide the cheesy goodness flavor I desired. “It’s time…” my mind murmured to me while I caramelized my onions. I puttered over to the computer and pulled up a few vegan cheese recipes. I decided on Angela’s from her blog Oh She Glows. I am pretty dedicated to her these days as she has really helped me on my path to wellness through food.
I accidentally misread the amount of mustard to be put in but it tasted delicious. The cashew flavor was pretty prominent however so I think I will play around with it some more. It did taste like cheese though and brought great flavor to the pizza. Ok vegan cheeze, I surrender.Gluten Free/Dairy Free Caramelized Onion and Mushroom Medley Pizza
Ingredients
• One gluten free pizza crust
• ¾ cup marinara (I used a bell pepper, black olive classico one)
• ½ package organic mushroom medley (cremini, Portobello, shitake)
• 1 sweet onion, cut into half moons
• Pinch kosher salt
• Black pepper to taste
• Angela’s vegan cheeze sauce (see recipe below)
• Extra virgin olive oil
Instructions
Preheat your oven to 375 F. Place your gluten free pizza crust on a pizza baking sheet. Smooth marinara evenly, leaving a quarter inch of edge for your crust. Lightly brush olive oil on exposed edges.
In a sauté pan on medium high heat add 1 tbs of EVOO and toss your onions in to coat. Add a pinch of kosher salt and constantly sauté and turn your onions until they have begun to turn a dark brown color. It took me about 20 minutes. Add the mushrooms and toss until softened, about another 5 minutes. I added a little Cajun seasoning because quite frankly I am obsessed but that is optional!
Remove from heat and let cool for a few minutes. Begin your cheeze sauce (recipe below). After taste testing…twice over here with absolute delight!...top your pizza with the veggies and finally drizzle the sauce on top. I added a little black pepper on top.
Bake in the oven for about 10-12 minutes or until your crust is golden brown.
Serve with a smile and say CHEEZE!
Angela’s “Cheeze” Sauce
Ingredients• 3/4 cup raw cashews
• 1 cup non-dairy milk (I used unsweetened + unflavoured soy milk), or more to thin out
• 3 garlic cloves
• 1 tbsp fresh lemon juice
• 2 tsp kosher salt, or to taste
• 6-7 tbsp Nutritional yeast (provides the cheesy consistency)
• 1/2 tsp Dijon mustard
• 1/2 tsp or a bit more of dried Italian seasoning
• 1/4-1/2 tsp Tumeric powder, optional (gives the orangey color)
• Freshly ground black pepper, to taste
InstructionsAssemble your cheeze sauce ingredients (cashews, non-dairy milk, garlic, lemon, salt, nutritional yeast, pepper, mustard, seasonings) and add just the cashews to food processor. Process until a fine crumb forms similar to corn meal. Now add in the rest of the cheese sauce ingredients and process until smooth. Adjust seasonings to taste.
**This recipe is vegan except for the pizza crust which contains eggs.
Monday, May 9, 2011
An American in Paris & Bruges
"France, and the whole of Europe have a great culture and an amazing history. Most important thing though is that people there know how to live!" Johnny Depp
Bonjour! I have returned from Europe and am bursting with new ideas, recipes to revamp, and well bursting at my hemlines as well! I was thrilled to see such interesting food culture and how they prepare and enjoy a meal. From grabbing a sandwich on the street to sitting down in luxurious, romantic settings boasting 4 hour meals, I was thoroughly exposed and inspired by the French and Flemish.
We first arrived in Belgium. Bruges to be exact. This quaint and colorful town was peppered with pretty buildings, glistening canals, specialty shops, and delicious fare from the sea. The cobblestone streets, preserved buildings, and lego structured rooftops left us feeling like we were on an ornate movie set, set back in time.We lived on a diet of mussels and frites with no complaints. That, and beer which was cheaper than water and a large part of the culture. The weather was perfect, the people friendly, and the food was incredible.Our last day in Belgium we rode our bikes up to Netherlands and created our own bicycle beer tour of the small town pubs on the way back. No worries gluten free vacationers, they have a gluten free brewery in Brussels!
Falling in love yet? That was just the beginning. We then took a train to Paris and spend a week emerged in the culture.
The good/bad for me thing about France is they LOVE THEIR BREAD. Love it. With everything. So, it wasn’t as easy for me to partake, however I did mentally collect how they used it in their meals and how I can twist it and make it gluten free.
I was asked a couple times if I would be sticking to the vegan diet when I went to Belgium and France. I went more of the vegetarian route when I could. It was my first time oversees and there were a couple things I have always been dying to try. To be honest, it wasn’t as satisfying as I thought to eat dairy and what not again, but it was something I thought necessary to try. After 6 days of 12 course dinners every night this Indie is READY TO DETOX! I enjoyed tasting and diving into the diverse food culture but I am craving healthy salads and fruit. Not that they don’t have that over there by any means but I was an American in Paris if you know what I mean.
I digress. Staying up for 22 hours traveling and sitting here jetlagged with my words falling off the document may propose a comprehensive block for you dear readers. That said, I will leave you with one of my favorite blogger’s recipes. It’s big. It’s green. AND it’s loaded with nutrients. Sounds good after what I have put my body through the last ten days ;)
Classic Green Monster
from Oh She Glows
Ingredients
• 1 cup almond milk, or milk of choice
• 1 ripe banana, preferably peeled + frozen
• 2 handfuls organic spinach
• 1 tbsp chia seeds OR 1 tbsp ground flax
• 1 tbsp nut butter
• 1-3 Ice cubes
Directions
Starting with the liquid, add in 1 cup of milk of your choice. Now add in the chia or flax and nut butter. Next, add in the spinach followed by the banana on top. Blend until smooth. Add in your ice cubes and blend some more. Serves 1- about 2 cups.
Don’t freak out about the spinach. You cannot taste it I promise :) You can however taste kale. Feel free to add different fruits or spices! This recipe is easily adaptable.
Bonjour! I have returned from Europe and am bursting with new ideas, recipes to revamp, and well bursting at my hemlines as well! I was thrilled to see such interesting food culture and how they prepare and enjoy a meal. From grabbing a sandwich on the street to sitting down in luxurious, romantic settings boasting 4 hour meals, I was thoroughly exposed and inspired by the French and Flemish.
We first arrived in Belgium. Bruges to be exact. This quaint and colorful town was peppered with pretty buildings, glistening canals, specialty shops, and delicious fare from the sea. The cobblestone streets, preserved buildings, and lego structured rooftops left us feeling like we were on an ornate movie set, set back in time.We lived on a diet of mussels and frites with no complaints. That, and beer which was cheaper than water and a large part of the culture. The weather was perfect, the people friendly, and the food was incredible.Our last day in Belgium we rode our bikes up to Netherlands and created our own bicycle beer tour of the small town pubs on the way back. No worries gluten free vacationers, they have a gluten free brewery in Brussels!
Falling in love yet? That was just the beginning. We then took a train to Paris and spend a week emerged in the culture.
The good/bad for me thing about France is they LOVE THEIR BREAD. Love it. With everything. So, it wasn’t as easy for me to partake, however I did mentally collect how they used it in their meals and how I can twist it and make it gluten free.
![]() |
| View from our balcony |
I digress. Staying up for 22 hours traveling and sitting here jetlagged with my words falling off the document may propose a comprehensive block for you dear readers. That said, I will leave you with one of my favorite blogger’s recipes. It’s big. It’s green. AND it’s loaded with nutrients. Sounds good after what I have put my body through the last ten days ;)
Classic Green Monster
from Oh She Glows
Ingredients
• 1 cup almond milk, or milk of choice
• 1 ripe banana, preferably peeled + frozen
• 2 handfuls organic spinach
• 1 tbsp chia seeds OR 1 tbsp ground flax
• 1 tbsp nut butter
• 1-3 Ice cubes
Directions
Starting with the liquid, add in 1 cup of milk of your choice. Now add in the chia or flax and nut butter. Next, add in the spinach followed by the banana on top. Blend until smooth. Add in your ice cubes and blend some more. Serves 1- about 2 cups.
Don’t freak out about the spinach. You cannot taste it I promise :) You can however taste kale. Feel free to add different fruits or spices! This recipe is easily adaptable.
Labels:
celiac,
gluten free,
healthy lifestyle,
recipes,
vegan,
vegan breakfast
Monday, April 18, 2011
Let’s Flake Out
"Just a spoon full of nutritional yeast can make the vitamins go down...I'll show you the most delightful way!"
I thought channeling Mary Poppins might help you read on and not shy away from what I am about to suggest you add to your food.Yellow in color and with a nutty cheesy flavor, nutritional yeast is an inactive yeast that is a favorite amongst many vegans because of its unique flavor and similarity to cheese when added to foods. A lot of people I know like to sprinkle it on hot popcorn, garlic bread, or create a “cheesy” pasta sauce.
Nutritional yeast is also a reliable food source of vitamin B12, so if you're vegan, it's a good idea to add some to your food regularly. They say to not add more than 3 tablespoons a day. Nutritional yeast can be found in the bulk foods or supplement section of your health food store. I bought the big jar of the whole foods brand. You can look for either nutritional yeast flakes or powder, but be sure you don't get brewer's yeast by mistake, as it's quite similar in appearance.
I am not going to lie to you dear readers, I was a little scared of the flakes and it wasn't because of the flake in the name. It was the yeast part. Yeast?? Oh a word that had such a negative connotation in my vocab. Why do I need to be eating yeast? I had all sorts of thoughts and worries about if it was something I needed to add to my diet. So I read. And researched. And read some more. And I figured, hey it couldn't hurt to try right? That's what this blog is about! I would like to share a little about what I found out.
Soooo…What IS it?
“Nutritional yeast is a tasty product you can find in natural foods markets. These yellow flakes are a pure strain of yeast called Saccharomyces cerevisiae. In the same family as edible mushrooms, yeast has been used in food and beverage production for more than 5,000 years. Today, the same strain is used to brew beer, make wine, and leaven breads as well as develop the nutritionally-rich food called nutritional yeast .
Each batch of nutritional yeast is grown on a mixture of cane and beet molasses for a period of seven days. B-vitamins are added during the process to provide the yeast with the nutrients it needs to grow. When harvested, the yeast is washed, pasteurized, and dried on roller drum dryers before it is ready for market. It is then used by food manufacturers in food products, added to boost the nutrient levels in pet foods, and simply packaged for sale in natural foods stores.
Vegans (strict vegetarians) have used it for years as a source of vitamin B-12, an essential nutrient found primarily in animal products. Health seekers who strive to eat primarily a whole foods diet use nutritional yeast because it tastes really good with certain foods and adds extra nutrients to their diet. It can be added when you cook quinoa in quinoa recipes, in salad dressings made with flax seed oil, or even sprinkled on top of free range chicken.
Unlike active baking yeast, nutritional yeast is grown solely for its nutritional value. It should not be confused with brewer’s yeast, a by-product of breweries and distilleries. nutritional yeast is a low-fat, low-sodium, kosher, non-GMO food that contains no added sugars or preservatives. The cane and beet molasses used in the growing process does not make nutritional yeast sweet and is not a source of simple sugars.”
Soooo...What do I DO with it?
Well, my husband jumped the gun and stirred it right into his soy milk. Just writing that makes my stomach turn. He won't touch the stuff now and quite frankly I don't blame him. I may not have if I had a bad first experience either. Patience is both a virtue and a food experience saver. I warned him to not dive head first into these flakes if you haven’t had them before. Men. Maybe I will sneak them in when he isn't looking a tell him after.
These are meant to be mixed in with food but I wouldn’t just dump it immediately into my drink. I added it to my sautéed veggie sandwich the other day and I LOVED it! It really does give a cheesy flavor and helps thicken your dish.
I have a macaroni and “cheese” recipe that I cannot wait to try out and share with you. Will these flakes flake out on their tasty goodness when starring in my dish? Stay tuned…
I thought channeling Mary Poppins might help you read on and not shy away from what I am about to suggest you add to your food.Yellow in color and with a nutty cheesy flavor, nutritional yeast is an inactive yeast that is a favorite amongst many vegans because of its unique flavor and similarity to cheese when added to foods. A lot of people I know like to sprinkle it on hot popcorn, garlic bread, or create a “cheesy” pasta sauce.
Nutritional yeast is also a reliable food source of vitamin B12, so if you're vegan, it's a good idea to add some to your food regularly. They say to not add more than 3 tablespoons a day. Nutritional yeast can be found in the bulk foods or supplement section of your health food store. I bought the big jar of the whole foods brand. You can look for either nutritional yeast flakes or powder, but be sure you don't get brewer's yeast by mistake, as it's quite similar in appearance.
I am not going to lie to you dear readers, I was a little scared of the flakes and it wasn't because of the flake in the name. It was the yeast part. Yeast?? Oh a word that had such a negative connotation in my vocab. Why do I need to be eating yeast? I had all sorts of thoughts and worries about if it was something I needed to add to my diet. So I read. And researched. And read some more. And I figured, hey it couldn't hurt to try right? That's what this blog is about! I would like to share a little about what I found out.
Soooo…What IS it?
“Nutritional yeast is a tasty product you can find in natural foods markets. These yellow flakes are a pure strain of yeast called Saccharomyces cerevisiae. In the same family as edible mushrooms, yeast has been used in food and beverage production for more than 5,000 years. Today, the same strain is used to brew beer, make wine, and leaven breads as well as develop the nutritionally-rich food called nutritional yeast .
Each batch of nutritional yeast is grown on a mixture of cane and beet molasses for a period of seven days. B-vitamins are added during the process to provide the yeast with the nutrients it needs to grow. When harvested, the yeast is washed, pasteurized, and dried on roller drum dryers before it is ready for market. It is then used by food manufacturers in food products, added to boost the nutrient levels in pet foods, and simply packaged for sale in natural foods stores.
Vegans (strict vegetarians) have used it for years as a source of vitamin B-12, an essential nutrient found primarily in animal products. Health seekers who strive to eat primarily a whole foods diet use nutritional yeast because it tastes really good with certain foods and adds extra nutrients to their diet. It can be added when you cook quinoa in quinoa recipes, in salad dressings made with flax seed oil, or even sprinkled on top of free range chicken.
Unlike active baking yeast, nutritional yeast is grown solely for its nutritional value. It should not be confused with brewer’s yeast, a by-product of breweries and distilleries. nutritional yeast is a low-fat, low-sodium, kosher, non-GMO food that contains no added sugars or preservatives. The cane and beet molasses used in the growing process does not make nutritional yeast sweet and is not a source of simple sugars.”
Soooo...What do I DO with it?
Well, my husband jumped the gun and stirred it right into his soy milk. Just writing that makes my stomach turn. He won't touch the stuff now and quite frankly I don't blame him. I may not have if I had a bad first experience either. Patience is both a virtue and a food experience saver. I warned him to not dive head first into these flakes if you haven’t had them before. Men. Maybe I will sneak them in when he isn't looking a tell him after.
These are meant to be mixed in with food but I wouldn’t just dump it immediately into my drink. I added it to my sautéed veggie sandwich the other day and I LOVED it! It really does give a cheesy flavor and helps thicken your dish.
I have a macaroni and “cheese” recipe that I cannot wait to try out and share with you. Will these flakes flake out on their tasty goodness when starring in my dish? Stay tuned…
Labels:
celiac,
gluten free,
healthy lifestyle,
recipes,
vegan,
vegetarian
Wednesday, April 6, 2011
Overnight Oatmeal Bliss
I love oatmeal. It is so versatile. But I don't have a ton of time in the morning to fix it. Between working out, getting ready, getting my son ready, making his lunch, taking care of the dog, and getting my husband and son fed...Whew! You can see I don't have time to spend 15-20 minutes on my own breakfast. On my Friday's off I truly cherish this time and sit and prepare something scrumptious and time consuming.
So back to the oatmeal. I don't like mine runny so it takes a little bit to cook down the liquid needed to achieve my Indie consistency perfection. I had seen "Vegan Overnight Oats" on the Oh She Glows blog and have been contemplating throwing these together to try. I have been good about stocking my pantry with bulk ingredients so luckily I had everything to make them last night! Cold oats? Hmmm. I did make YOU wait overnight for a recipe though so I figured making myself wait overnight to try these oats was only fair. Yes, yes the things I do for you dear readers ;)
I wanted to start with the basic oats and if I liked them, then you and I can have some fun adventures! My husband said that he wanted to try them too so I doubled the recipe. I was hoping that it wouldn't mess it up. Hoping and praying because I relied on this meal for my morning fuel! It doesn't require many ingredients and took only 5 minutes to make!
I pulled the bowl out of the fridge this morning and was very satisfied that I at least already had breakfast prepared! I divided the portions between two bowls and still had some leftover. Yipee!
Taste test. Oh. My. Gosh. Obsessed. I was leary of eating cold oats but these were AMAZING! Truly! Creamy and the perfect consistency. We both added a tablespoon of almond butter to ours. Maple syrup was also suggested but we didn't have any organic real syrup so we skipped it. It wasn't missed.
Here is the original recipe. Like I said, I just doubled everything but then ended up with extras (not complaining!). I can't wait to add fruit and nuts to these in the future! Besides a bowl of cereal, this is probably the least laborsome and delicious breakfast I have made. Here is the link to the original recipe and comments from Oh She Glows Easy Vegan Overnight Oats
Vegan Overnight Oats
Ingredients for PM
Directions
Mix together all the above ingredients in a bowl and place in the fridge overnight.
AM Directions
Scoop out your desired portion into the bowl. We added one tablespoon of natural almond butter. Enjoy!
So back to the oatmeal. I don't like mine runny so it takes a little bit to cook down the liquid needed to achieve my Indie consistency perfection. I had seen "Vegan Overnight Oats" on the Oh She Glows blog and have been contemplating throwing these together to try. I have been good about stocking my pantry with bulk ingredients so luckily I had everything to make them last night! Cold oats? Hmmm. I did make YOU wait overnight for a recipe though so I figured making myself wait overnight to try these oats was only fair. Yes, yes the things I do for you dear readers ;)
I wanted to start with the basic oats and if I liked them, then you and I can have some fun adventures! My husband said that he wanted to try them too so I doubled the recipe. I was hoping that it wouldn't mess it up. Hoping and praying because I relied on this meal for my morning fuel! It doesn't require many ingredients and took only 5 minutes to make!
I pulled the bowl out of the fridge this morning and was very satisfied that I at least already had breakfast prepared! I divided the portions between two bowls and still had some leftover. Yipee!
| I forgot to snap a picture this morning but it looked like hers! |
Here is the original recipe. Like I said, I just doubled everything but then ended up with extras (not complaining!). I can't wait to add fruit and nuts to these in the future! Besides a bowl of cereal, this is probably the least laborsome and delicious breakfast I have made. Here is the link to the original recipe and comments from Oh She Glows Easy Vegan Overnight Oats
Vegan Overnight Oats
Ingredients for PM
- 1/3 cup regular oats
- 3/4 cup almond milk
- 2 tablespoons chia seeds
- 1 small ripe banana, peeled and smashed
- 1/4 teaspoon pure vanilla extract
Directions
Mix together all the above ingredients in a bowl and place in the fridge overnight.
AM Directions
Scoop out your desired portion into the bowl. We added one tablespoon of natural almond butter. Enjoy!
Tuesday, April 5, 2011
"A Day Without Shoes"
I awoke this morning with an excitement because I knew that I was going to make a difference today. By not wearing shoes for one day I was going to bring awareness to one big problem. A problem that one company, TOMS, decided it was time to resolve. A problem that one person can make a difference by doing one thing.
Today, I am participating in TOMS campaign “A Day Without Shoes” to drive awareness to the tremendous problem of foot-borne illness in developing nations and what many experience here in the states by going a day without shoes. The company I work for, Inceed, is a supporter of TOMS and their campaign, and challenged everyone in our offices to go one day without shoes. I couldn’t resist writing about the experience, even though usually my blog is primarily about food and living gluten free! I'll toss in an ending recipe for you sweet readers, how about that?
4:50 AM
The bell tolls on my phone to start my day. Bright, bubbly bells clinging together as I cling to the under side of my warm comforter. I throw myself out of bed after a couple stalling stretches, get dressed for my work out ,and head to the gym. Sans shoes. My first reaction when I stepped out this morning into the early morning air? It is frigid out! I haven’t felt the bare, cold concrete on my bare feet for a while. Why did it have to be 30 degrees today?
Driving barefoot wasn’t anything too new to me. I did have to scoot my seat up a few inches to compensate the distance from me heels.
I arrived at the gym and walked across the sidewalk, and onto the rough wooden slat bridge while praying the whole time that I wouldn’t be pricked with a splinter. I have never paid attention the roughness of that before! The trainer looked at me curiously. I explained what my mission was for the day. Although he said it was admirable, and even though I asked nicely (with cherries on top??) they said it was a liability for me to run on the treadmill without shoes. Darn. But hey, the thought that counts maybe? I suppose this one instance will have to slide. I can’t fight with liability. I did run a couple seconds when nobody was looking at the end of my work out SSSHHHH!
7:00 AM
Walking around the house this morning wasn’t too bad. The tile floors were chilly and hard on my feet and I did miss my slippers. I know the floors are clean though. Leaving the house again for work will be a different story.
7:40 AM
Time to get out of my car at work. I pause imminently in the parking lot and listen to my breath slowly inhale and exhale. I peruse the lot for glass, old wrappers, anything sticky… Oh who am I kidding? There is worse stuff microscopically lurking in the bits of pressed tar and concrete.
7:45 AM
I tip toe/ hop idiotically across the parking lot to the sidewalk. By the time I get there I decided that I am just going to have to suck it up and do it right. I laid my foot flat on the sidewalk lining our building. Whew. A long breath seeps out. This is going to be stressful. Here is the real kicker though…I was even more grossed out walking into our building. The tiles felt grimy and I grimaced with every step. I was happy to get into the carpeted elevator and up to my office.
8:30
Walking around the office isn’t too much a doozy for me. I sometimes do it when my feet are paining from me heels. Plus, I am surrounded by my barefoot co workers! The reinforcement really helped me stay on track. I have my TOMS shoes next to me, but I am now adamant about completing this challenge. I have a choice, those children without shoes don’t. Today, I am not going to give myself a choice.
9:00
Oh. No.
No. No. Please No. I didn’t think about this coming up. I have to use the restroom. I have to use the restroom without shoes. No.
9:10
Okay, I have to go. I walk anxiously down the hallway, pass the row of elevators, and through the other glass door. As the door shuts I wince at the loud clicking it makes to secure. I feel like it’s the gunshot at the first of a race, prodding me to get going. I open the swinging door and let it close. Once. Twice. I pep talk myself and step in. The automatic light won’t go on where the stalls are located. Great. Barefoot, and in the dark. I think I will hold it for a longer period next go around.
9:15
Back at my desk and feeling better. First challenges? Check!
11:25
My feet are cold! My office is always cold and my pumps helped pump warm blood through my feet. I would love to soak them in a hot tub right now. With soap! hehe
I am about to head to lunch with my co workers and I am very excited to march in together! Tracy, owner of Cafe Samana, said we could lunch at her restaurant barefoot! How sweet is she? Anyone that visits her restaurant today can dine without shoes. Go support this great cause Tulsa, and if you don't live in the area, make an effort to find a local place to show those cute toes while you eat!
11:40
Leaving the building without my shoes on was not as hard this time. The concrete was warm on my feet and it reminded me of running around as a kid all summer without shoes. I never thought twice about it then. Don't worry, I am not losing sight of why we are doing this and I have thought about the children who do this everyday.
11:45
Lunch at Cafe Samana with my co workers! We all enjoyed delicious healthy food from Tracy's kitchen without shoes. When my partner Scott and I entered the restaurant we definitely both felt a little awkward. A little giggle emerged from all of us as we took our seats. I felt silly and almost embarrassed at first. I got a few looks in the parking lot but once we were seated I was comfortable. Cafe Samana will have that effect on anyone... Comfort and Charm.
12:45
Back in the office and content from lunch. My feet are happy campers...until I have to visit the restroom again. Not looking forward to that!
3:30
Let's break up the afternoon by putting one BAREfoot in front of the other! Check out TOMS site to learn about their mission, and what "one for one" really means: TOMS ONE for ONE <---Click me!
I think I will snack on the rest of my soup to tide me over until dinner. I am really wishing I had shoes or wool socks to keep me warm. Cold feetsies to the fridge!
6:00
I am about to run into my first meeting with someone. This should be interesting! I will be ready to do some explaining as to why I am barefoot!
15 min later...
Well, she got a kick out of me being barefoot! It was an impressed reaction versus appalled :)
6:15
Well, I am headed to dinner with the family! I will update how the rest of my night went tomorrow morning, and share with you some insight about my co workers day as well! Foot soak tonight!
6:45
Met my parents and grandparents for dinner at Chicory and Chives. Have you been? It is great authentic cajun food! Walking across the parking lot wasn't TOO bad...I kind of got used to that today. However, once I walked in to the restaurant I felt my stomach turn. I don't think the customers appreciated my bare feet. I walked quickly to the table and hid my feet. Ah, much better. My parents were not too happy that I was walking around barefoot all day.
8:00
Home at last. I rushed upstairs and turned the bath tub fauct to SCORCHING and begin scrubbing my feet. It was so satisfying. My husband came in and said something that brought the entire day into perspective: "Honey do you know how easily you could have contracted something today? Your feet are like a gateway into your body. Remember when we put VICKS on our feet and we could smell and almost taste it within minutes?"
That is exactly the point! If we wear shoes we are protected from those foot borne illnesses. If we could all make an effort to support TOMS, we could help stop the deaths of many children in developing countries.
Tomorrow I will post a recipe for all you dear readers who followed me today!
Today, I am participating in TOMS campaign “A Day Without Shoes” to drive awareness to the tremendous problem of foot-borne illness in developing nations and what many experience here in the states by going a day without shoes. The company I work for, Inceed, is a supporter of TOMS and their campaign, and challenged everyone in our offices to go one day without shoes. I couldn’t resist writing about the experience, even though usually my blog is primarily about food and living gluten free! I'll toss in an ending recipe for you sweet readers, how about that?
4:50 AM
The bell tolls on my phone to start my day. Bright, bubbly bells clinging together as I cling to the under side of my warm comforter. I throw myself out of bed after a couple stalling stretches, get dressed for my work out ,and head to the gym. Sans shoes. My first reaction when I stepped out this morning into the early morning air? It is frigid out! I haven’t felt the bare, cold concrete on my bare feet for a while. Why did it have to be 30 degrees today?
Driving barefoot wasn’t anything too new to me. I did have to scoot my seat up a few inches to compensate the distance from me heels.
I arrived at the gym and walked across the sidewalk, and onto the rough wooden slat bridge while praying the whole time that I wouldn’t be pricked with a splinter. I have never paid attention the roughness of that before! The trainer looked at me curiously. I explained what my mission was for the day. Although he said it was admirable, and even though I asked nicely (with cherries on top??) they said it was a liability for me to run on the treadmill without shoes. Darn. But hey, the thought that counts maybe? I suppose this one instance will have to slide. I can’t fight with liability. I did run a couple seconds when nobody was looking at the end of my work out SSSHHHH!
7:00 AM
Walking around the house this morning wasn’t too bad. The tile floors were chilly and hard on my feet and I did miss my slippers. I know the floors are clean though. Leaving the house again for work will be a different story.
7:40 AM
Time to get out of my car at work. I pause imminently in the parking lot and listen to my breath slowly inhale and exhale. I peruse the lot for glass, old wrappers, anything sticky… Oh who am I kidding? There is worse stuff microscopically lurking in the bits of pressed tar and concrete.
7:45 AM
I tip toe/ hop idiotically across the parking lot to the sidewalk. By the time I get there I decided that I am just going to have to suck it up and do it right. I laid my foot flat on the sidewalk lining our building. Whew. A long breath seeps out. This is going to be stressful. Here is the real kicker though…I was even more grossed out walking into our building. The tiles felt grimy and I grimaced with every step. I was happy to get into the carpeted elevator and up to my office.
8:30
Walking around the office isn’t too much a doozy for me. I sometimes do it when my feet are paining from me heels. Plus, I am surrounded by my barefoot co workers! The reinforcement really helped me stay on track. I have my TOMS shoes next to me, but I am now adamant about completing this challenge. I have a choice, those children without shoes don’t. Today, I am not going to give myself a choice.
9:00
Oh. No.
No. No. Please No. I didn’t think about this coming up. I have to use the restroom. I have to use the restroom without shoes. No.
9:10
Okay, I have to go. I walk anxiously down the hallway, pass the row of elevators, and through the other glass door. As the door shuts I wince at the loud clicking it makes to secure. I feel like it’s the gunshot at the first of a race, prodding me to get going. I open the swinging door and let it close. Once. Twice. I pep talk myself and step in. The automatic light won’t go on where the stalls are located. Great. Barefoot, and in the dark. I think I will hold it for a longer period next go around.
9:15
Back at my desk and feeling better. First challenges? Check!
11:25
My feet are cold! My office is always cold and my pumps helped pump warm blood through my feet. I would love to soak them in a hot tub right now. With soap! hehe
I am about to head to lunch with my co workers and I am very excited to march in together! Tracy, owner of Cafe Samana, said we could lunch at her restaurant barefoot! How sweet is she? Anyone that visits her restaurant today can dine without shoes. Go support this great cause Tulsa, and if you don't live in the area, make an effort to find a local place to show those cute toes while you eat!
11:40
Leaving the building without my shoes on was not as hard this time. The concrete was warm on my feet and it reminded me of running around as a kid all summer without shoes. I never thought twice about it then. Don't worry, I am not losing sight of why we are doing this and I have thought about the children who do this everyday.
11:45
Lunch at Cafe Samana with my co workers! We all enjoyed delicious healthy food from Tracy's kitchen without shoes. When my partner Scott and I entered the restaurant we definitely both felt a little awkward. A little giggle emerged from all of us as we took our seats. I felt silly and almost embarrassed at first. I got a few looks in the parking lot but once we were seated I was comfortable. Cafe Samana will have that effect on anyone... Comfort and Charm.I started with a cup of chilled carrot soup followed by a delicious deconstructed wrap that she had for the special today. Soft mango strips, roasted red peppers with warm black beans covered a bed of spinach and arugula. Always a delight to eat here!
12:45
Back in the office and content from lunch. My feet are happy campers...until I have to visit the restroom again. Not looking forward to that!
3:30
Let's break up the afternoon by putting one BAREfoot in front of the other! Check out TOMS site to learn about their mission, and what "one for one" really means: TOMS ONE for ONE <---Click me!
I think I will snack on the rest of my soup to tide me over until dinner. I am really wishing I had shoes or wool socks to keep me warm. Cold feetsies to the fridge!
6:00
I am about to run into my first meeting with someone. This should be interesting! I will be ready to do some explaining as to why I am barefoot!
15 min later...
Well, she got a kick out of me being barefoot! It was an impressed reaction versus appalled :)
6:15
Well, I am headed to dinner with the family! I will update how the rest of my night went tomorrow morning, and share with you some insight about my co workers day as well! Foot soak tonight!
6:45
Met my parents and grandparents for dinner at Chicory and Chives. Have you been? It is great authentic cajun food! Walking across the parking lot wasn't TOO bad...I kind of got used to that today. However, once I walked in to the restaurant I felt my stomach turn. I don't think the customers appreciated my bare feet. I walked quickly to the table and hid my feet. Ah, much better. My parents were not too happy that I was walking around barefoot all day.
8:00
Home at last. I rushed upstairs and turned the bath tub fauct to SCORCHING and begin scrubbing my feet. It was so satisfying. My husband came in and said something that brought the entire day into perspective: "Honey do you know how easily you could have contracted something today? Your feet are like a gateway into your body. Remember when we put VICKS on our feet and we could smell and almost taste it within minutes?"
That is exactly the point! If we wear shoes we are protected from those foot borne illnesses. If we could all make an effort to support TOMS, we could help stop the deaths of many children in developing countries.
Tomorrow I will post a recipe for all you dear readers who followed me today!
Thursday, March 31, 2011
Ole! Ole, Ole, Ole...
I love Mexican food all year round. It’s easy to eat gluten free friendly for one thing, and who can resist those flavors? Lucky for me, there are plenty of awesome restaurants around here to choose from that hit whatever kind of “Mexican food” you are in for. I choose my Mexican restaurant wisely. See here's the thing, when I crave food, I crave very specific food. I don't crave chocolate, I crave a specific dark chocolate from a specific brand. Usually something out of my reach. Yes, I know, I must be awesome to live with when one of these cravings hit. So when I crave 'mexican food', a burrito from Bueno won’t satisfy this Indie. When you have plenty to choose from, you get to be a little picky even when you have food allergies or food specifications.
Spring in Tulsa brought some warm weather earlier on this year. I am certainly not complaining! When the mexi-bug hits me this time of year, I am not headed for the loaded down enchilada by the cozy fireplace. I want an outdoor patio, a fresh squeezed lime margarita, smooth salsa and corn chips, and a heaping bowl of guacamole. To start with. And I know exactly where I’ll head. Café Ole on Brookside.
Café Ole has been a restaurant staple for me for years. It opened it's doors in 1987 and has since been serving up sassy southwestern style cuisine to the locals. Tucked into the heart of brookside, this charming establishment is a breath of fresh air. I love sitting on their outdoor patio, listening to the occasional live music, and feeling the spring air wisp around me as I sip the best margarita in town. Yes, it’s my favorite. My husband loves a margarita, but I love a perfect margarita. No mix for his gal. I want the real deal. Like I said, when you can picky and get the best, why wouldn’t you? This margarita doesn't need a fancy schmancy margarita glass masking the real deal with a ring with colored salt facade around the rim. Nope. This lime monster looks innocent in it's plain jane appearence and delivers the best tasting experience. You may not want to drink more than two though warn. If you do though, please share below ;)
We started our meal with their house made guacamole and complimentary chips and salsa. Oh, I could eat that peppery salsa all day. After a couple margs we decided it was best to order. I usually go for the Spinach Enchiladas anyway, but this visit was unique. I wanted to see if this dish was chalked up to vegan standards as well. Would my enchilada bring the heat without the ooey gooey melty cheese?
Si amigos. It delivered and as always the staff was overly accommodating. I used to get so embarrassed asking the waiter to prepare things differently. Here, it’s never a problem. My husband and I split the order and they brought it out on separate plates for us. Absolutely wonderfully prepared as always. The corn tortilla was thickly stuffed with fresh spinach and topped with sliced, crunchy green onions and juicy tomatoes.Their black beans are always cooked just before mushing point, and accompagnied by fluffy rice and plump corn. I topped it all off with some of our guac and as always it was flawlessly filling and simply satisfying.
If you haven’t tried this local spot, head there now! It's great for date night, friends, or with the kiddos. Kid tested by this mommy so I speak with confidence when I say it's okay to cart them along.When the weather is brisk the patio glows with their outdoor fireplace. Otherwise, wait until the sun peaks and head and enjoy some wonderful southwestern cuisine on the shaded breezy patio. You won’t be disappointed.
Spring in Tulsa brought some warm weather earlier on this year. I am certainly not complaining! When the mexi-bug hits me this time of year, I am not headed for the loaded down enchilada by the cozy fireplace. I want an outdoor patio, a fresh squeezed lime margarita, smooth salsa and corn chips, and a heaping bowl of guacamole. To start with. And I know exactly where I’ll head. Café Ole on Brookside.
Café Ole has been a restaurant staple for me for years. It opened it's doors in 1987 and has since been serving up sassy southwestern style cuisine to the locals. Tucked into the heart of brookside, this charming establishment is a breath of fresh air. I love sitting on their outdoor patio, listening to the occasional live music, and feeling the spring air wisp around me as I sip the best margarita in town. Yes, it’s my favorite. My husband loves a margarita, but I love a perfect margarita. No mix for his gal. I want the real deal. Like I said, when you can picky and get the best, why wouldn’t you? This margarita doesn't need a fancy schmancy margarita glass masking the real deal with a ring with colored salt facade around the rim. Nope. This lime monster looks innocent in it's plain jane appearence and delivers the best tasting experience. You may not want to drink more than two though warn. If you do though, please share below ;)
We started our meal with their house made guacamole and complimentary chips and salsa. Oh, I could eat that peppery salsa all day. After a couple margs we decided it was best to order. I usually go for the Spinach Enchiladas anyway, but this visit was unique. I wanted to see if this dish was chalked up to vegan standards as well. Would my enchilada bring the heat without the ooey gooey melty cheese?
Si amigos. It delivered and as always the staff was overly accommodating. I used to get so embarrassed asking the waiter to prepare things differently. Here, it’s never a problem. My husband and I split the order and they brought it out on separate plates for us. Absolutely wonderfully prepared as always. The corn tortilla was thickly stuffed with fresh spinach and topped with sliced, crunchy green onions and juicy tomatoes.Their black beans are always cooked just before mushing point, and accompagnied by fluffy rice and plump corn. I topped it all off with some of our guac and as always it was flawlessly filling and simply satisfying.
If you haven’t tried this local spot, head there now! It's great for date night, friends, or with the kiddos. Kid tested by this mommy so I speak with confidence when I say it's okay to cart them along.When the weather is brisk the patio glows with their outdoor fireplace. Otherwise, wait until the sun peaks and head and enjoy some wonderful southwestern cuisine on the shaded breezy patio. You won’t be disappointed.
Wednesday, March 30, 2011
Black Bean Brownies
I know what you are thinking…this GF Indie has gone mad and all those veggies have finally gone to her head. Why would I EVER put black beans in my brownies?? Believe me I was there. And in this case, seeing isn’t believing. Tasting is believing. If you are looking for a healthy, nutritious, and fudgy brownie then you HAVE to try these! My first go around did come out a bit too fudgy consistency, if there is such thing, so I think a little flour, a chia egg, and some more oats will be in order for next round. I also need to use a smaller square pan vs longer pan. Small set back from living with the rents while we build our house. Trial and error. But tasty trial and errors. I am happy to make them again! Which quite possibly might be tonight since I may have gobbled up the first batch already…
Oh and confession: I thought about renaming them yummy poo brownies because that is what my husband said they looked like (not tasted like mind you) but I figured if I was going to convince you readers to try them, that probably wouldn't be the best way...
Black Bean Brownies
Ingredients
- 15 ounces black beans, drained and rinsed
- 2 whole bananas, chopped
- 1/3 cup agave nectar
- 1/4 cup unsweetened cocoa
- 1 tbs ground cinnamon
- 1 tsp organic vanilla extract
- 1/4 cup raw sugar
- 1/2 cup instant oats
Preheat your oven to 350 F. Grease an 8x8 pan and set aside. Combine all ingredients, except oats (unless you used raw oats like I did) in a food processor. Blend until smooth, scrapping sides as needed. Stir in your oats (if using instant) and pour batter into the pan.
Bake for approx 30 minutes. I used a longer pan instead of square so my baked quicker. Let cool before slicing. Pop in the fridge or freezer for an easy treat!!
*Recipe adapted from HappyHerbivore
Labels:
celiac,
dessert,
gluten free,
gluten free baking,
vegan,
vegan desserts
Tuesday, March 29, 2011
Grey Days, Souper Comfort
Springtime storms are officially here. It is another gray and rainy morning here in Tulsa. I keep reminding myself that the heavy clouds are pouring colors into our dreary surroundings. I am happy to see the lavender buds on the trees, and the pops of white petals drifting in the warm breezes. This morning I have yet to fully awake as I write but alas I do have to be at work early this week so I have no choice but to wipe the sleep from my eyes and begin. So bear with these stiff fingers and clouded mind as I share with you a delicious vegan soup!
Ah soup. Such a perfect comfort food. I have been on many soup binges in my life I must admit. Hey, don’t judge, we can’t help what we crave sometimes. It could be a hundred degrees, humid, and sweltering, and my soup fix could get me itchin’. Maybe because it is such a versatile little bowl of nutrients. Or the fact that it seems to warm my tummy and easy my troubles simultaneously.
Regardless of why I crave it, it’s important that I pay attention to what kind of soup I am eating these days. And not just because of the lurking gluten monster disguising itself in the ingredients. Canned soups can pack a ton of extra sodium that makes my joints cry out with swollen sobs. Plus, who wants UFI’s (unidentified floating ingredients) in their bowl? Well, not me. But hey, if you’re comfortable teetering that Area 51 line go right ahead! It’s not to say that I haven’t divulged in a cup of Ramen in my day. Now I just am aware of how puffy I plump with the additives so I think I personally will steer clear. Maybe it was also a sign when I managed to catch my ramen noodles on fire in the sorority house microwave. No water = flames. See, we all have to grow our “natural” cooking skills from somewhere.
My remedy to the soup equation I have rolling here would be to make your OWN soup! That is much more satisfying anyway right? I looked at a ton of soup recipes over the weekend and managed to settle on my one to share. My past soups were good, but I wanted to try something new for you. A couple blogs mentioned this stew, and after a couple of my own little tweaks I think it was PERFECT! I am thrilled also because it makes a lot so I have a comfort food dinner to last me through the next gray days.
Here is the original recipe below, and you can find my changes in the notes. I had to take in account some g-free factors of course in my recipe and directions. Both I am sure are delicious and nutritious.
Kathy's Veggie (vegan) Pasta Stew
1. In a large soup pot, add the onions, tomato, mushrooms, garlic and olive oil. Stir and saute for about 5 minutes, until the onions become translucent.
3. When you are just about ready to serve the soup, you can add in the beans and greens. Adding the last keeps them tender and not mushy. If you want your greens a bit more hearty, use kale or collard. Spinach wilts very easily.
My changes to the Recipe:
Directions:
1. In a large soup pot, add the onions, tomato, mushrooms, garlic and olive oil. Stir and saute for about 10 minutes, until the onions become translucent.
2. Add in all the remaining ingredients (except the beans, pasta and leafy greens). Bring to a boil, then reduce to a simmer and cover with lid. I transferred to my crock pot and let it simmer on low for 40 minutes. Do a few taste tests midway through and check on the salt/spice levels.
3. While your soup is simmering, cook you gluten free pasta to al dente. With the potatoes begin to soften, about 30 minutes, add in your pasta to the pot.
4. When you are just about ready to serve the soup, you can add in the beans and greens. Adding the last keeps them tender and not mushy. If you want your greens a bit more hearty, use kale or collard. Spinach wilts very easily.
5. Serve warm! I toasted Food for Life’s gluten free rice bread in the oven with a drizzle of olive oil and a dash of Cajun spice to accompany the soup.
Ah soup. Such a perfect comfort food. I have been on many soup binges in my life I must admit. Hey, don’t judge, we can’t help what we crave sometimes. It could be a hundred degrees, humid, and sweltering, and my soup fix could get me itchin’. Maybe because it is such a versatile little bowl of nutrients. Or the fact that it seems to warm my tummy and easy my troubles simultaneously.
Regardless of why I crave it, it’s important that I pay attention to what kind of soup I am eating these days. And not just because of the lurking gluten monster disguising itself in the ingredients. Canned soups can pack a ton of extra sodium that makes my joints cry out with swollen sobs. Plus, who wants UFI’s (unidentified floating ingredients) in their bowl? Well, not me. But hey, if you’re comfortable teetering that Area 51 line go right ahead! It’s not to say that I haven’t divulged in a cup of Ramen in my day. Now I just am aware of how puffy I plump with the additives so I think I personally will steer clear. Maybe it was also a sign when I managed to catch my ramen noodles on fire in the sorority house microwave. No water = flames. See, we all have to grow our “natural” cooking skills from somewhere.
My remedy to the soup equation I have rolling here would be to make your OWN soup! That is much more satisfying anyway right? I looked at a ton of soup recipes over the weekend and managed to settle on my one to share. My past soups were good, but I wanted to try something new for you. A couple blogs mentioned this stew, and after a couple of my own little tweaks I think it was PERFECT! I am thrilled also because it makes a lot so I have a comfort food dinner to last me through the next gray days.
Here is the original recipe below, and you can find my changes in the notes. I had to take in account some g-free factors of course in my recipe and directions. Both I am sure are delicious and nutritious.
Kathy's Veggie (vegan) Pasta Stew
- 4 ounces sliced mushrooms
- 1 medium tomato
- 1 large sweet onion
- 1/4 cup extra virgin olive oil
- 1/2 tsp pepper
- 1 tsp garlic powder or 2 Tbsp chopped fresh garlic
- 2 bay leaves
- 4 cups vegetable broth
- 1 cup water
- 2 Tbsp Italian Herbs
- 1 potato, diced
- 1/3 cup nutritional yeast or 1/4 cup vegan cheese
- 1 cup dry fusilli pasta
- 1/3 cup leftover roasted tomato salsa
- 2 Tbsp apple cider vinegar
- 1/4 tsp salt (or to taste)
- 1 can of beans, drained (I used white cannellini beans)
- 6 ounces leafy greens (spinach, kale, chard, collard..)
![]() |
| I think a better camera is in order... |
Directions:
2. Add in all the remaining ingredients (except the beans and leafy greens). Bring to a boil, then reduce to a simmer and cover with lid. Allow to simmer for 20 minutes. Do a few taste tests midway through and check on the salt/spice levels.
3. When you are just about ready to serve the soup, you can add in the beans and greens. Adding the last keeps them tender and not mushy. If you want your greens a bit more hearty, use kale or collard. Spinach wilts very easily.
4. Serve warm! With a nice slice of crusty bread.
My changes to the Recipe:
- 4 ounces sliced mushrooms – I used a blend pack of portobella, cremini and shitake
- 2 small/medium vine tomatoes
- 1 large sweet onion
- 1/4 cup extra virgin olive oil
- 1 tbs pepper
- 2 cloves of garlic, minced
- 2 bay leaves
- 4 cups organic, low sodium vegetable broth
- 1 cup water
- 2 Tbsp Fine Herbs
- 3 Yukon gold potatoes, chopped
- ¼ cup vegan cheddar
- 1 cup dry gluten free fusilli pasta
- 1 tbs kosher salt (or to taste)
- 1 can of beans, drained (I used white cannellini beans)
- 6 ounces leafy greens – I used a large bunch of fresh spinach since it cooks down
Directions:
1. In a large soup pot, add the onions, tomato, mushrooms, garlic and olive oil. Stir and saute for about 10 minutes, until the onions become translucent.
2. Add in all the remaining ingredients (except the beans, pasta and leafy greens). Bring to a boil, then reduce to a simmer and cover with lid. I transferred to my crock pot and let it simmer on low for 40 minutes. Do a few taste tests midway through and check on the salt/spice levels.
3. While your soup is simmering, cook you gluten free pasta to al dente. With the potatoes begin to soften, about 30 minutes, add in your pasta to the pot.
4. When you are just about ready to serve the soup, you can add in the beans and greens. Adding the last keeps them tender and not mushy. If you want your greens a bit more hearty, use kale or collard. Spinach wilts very easily.
5. Serve warm! I toasted Food for Life’s gluten free rice bread in the oven with a drizzle of olive oil and a dash of Cajun spice to accompany the soup.
Wednesday, March 23, 2011
Burger. What's in a Name?
What's in a name? That which we call a burger by any other name would smell as savory…
Burgers. We all love ‘em. And that is exactly what was on the menu last night! But like dear Juliet portrayed in her soliloquy, this burger is far more than its mere given title. This is not your meat packed patty that pops in your noggin when you hear ‘burger’. No, this burger is better is better than that. Yes, I am calling you out. My burger is better than your burger.
Nanner Nanner Boo Boo.
This burger is packed with protein, and oh was it delicious! I saw the recipe on “Oh She Glows” and knew that my first homemade veggie burger would be this one. A couple gluten free adaptions and we were ready to go! Obviously these can me made with non gluten free ingredients as well. So let’s bust out the food processor and start patty cakin’ those veggie patties together. Oh and if your grill has not shed its winter cover, no worries! These are baked to goodness in your oven!
Vegan & Gluten Free Lentil-Walnut Burgers
Ingredients:
• 3/4 cup lentils, picked over and rinsed
• 3/4 cup walnuts, toasted
• 1 piece gluten free bread, toasted OR 1/3 cup GF breadcrumbs
• 1 tsp ground cumin
• 2 tsp ground coriander
• 1/4 tsp red pepper flakes
• 3 cloves garlic
• 1/4 tsp sea salt
• Freshly ground pepper
• 1 tbsp extra virgin olive oil
• 1 chia/flax egg (1 tbsp ground chia or flax + 1/4 cup water)
Directions
Preheat oven to 350F. In a small bowl make the chia or flax egg and set aside. Place lentils in a small pot and add a couple cups of water. Bring to a boil and simmer for about 25 minutes. Remove and rinse in colander.
While the lentils are cooking, toast the walnuts by placing the walnuts on a baking sheet and cooking at 350F for about 12 minutes until golden brown and delicious. Let cool.
In a food processor, process the garlic, walnuts, toasted bread OR breadcrumbs, garlic, spices & seasonings until combined. Now add oil and lentils and pulse until coarsely chopped (some lentils should be visible and left chunky). Add the flax or chia egg and pulse a bit more until combined.
Now shape 4 patties with hands and place on a baking sheet lined with parchment or a non-stick mat. Bake at 350F for 20-22 minutes on each side for a total of 40-45 mins. bake time. Makes 4 patties. Adapted from Martha’s Great Food Fast Cookbook from the Blog Oh She Glows.
We topped ours with fresh spinach and ripe tomato. The tomato is a must! I was planning on adding guacamole but they had over ripened. But no worries, we have 2 left for tonight and I am headed to the store at lunch to pick up some avocados!
Our burgers didn’t need the whole 22 minutes once they were flipped. I was being careful that didn’t turn out too dry either. Make sure that you make your patties even. If the ends are thinner they are likely to dry out an burn. Nobody wants a burned burger.
I have yet to find a Vegan & Gluten Free Bread or Hamburger Buns so unfortunately I strayed from my vegan diet last night. One step at a time. I have cut out milk and cheese. Eggs were baked in this bread but I have been cutting them out otherwise. If you know of any gluten free/vegan breads let me know!
I cannot wait to experiment with different recipes after making this one. Of course I will be changing it up and posting new ones for you!
Burgers. We all love ‘em. And that is exactly what was on the menu last night! But like dear Juliet portrayed in her soliloquy, this burger is far more than its mere given title. This is not your meat packed patty that pops in your noggin when you hear ‘burger’. No, this burger is better is better than that. Yes, I am calling you out. My burger is better than your burger.
Nanner Nanner Boo Boo.
This burger is packed with protein, and oh was it delicious! I saw the recipe on “Oh She Glows” and knew that my first homemade veggie burger would be this one. A couple gluten free adaptions and we were ready to go! Obviously these can me made with non gluten free ingredients as well. So let’s bust out the food processor and start patty cakin’ those veggie patties together. Oh and if your grill has not shed its winter cover, no worries! These are baked to goodness in your oven!
Vegan & Gluten Free Lentil-Walnut Burgers
Ingredients:
• 3/4 cup lentils, picked over and rinsed
• 3/4 cup walnuts, toasted
• 1 piece gluten free bread, toasted OR 1/3 cup GF breadcrumbs
• 1 tsp ground cumin
• 2 tsp ground coriander
• 1/4 tsp red pepper flakes
• 3 cloves garlic
• 1/4 tsp sea salt
• Freshly ground pepper
• 1 tbsp extra virgin olive oil
• 1 chia/flax egg (1 tbsp ground chia or flax + 1/4 cup water)
Directions
Preheat oven to 350F. In a small bowl make the chia or flax egg and set aside. Place lentils in a small pot and add a couple cups of water. Bring to a boil and simmer for about 25 minutes. Remove and rinse in colander.
While the lentils are cooking, toast the walnuts by placing the walnuts on a baking sheet and cooking at 350F for about 12 minutes until golden brown and delicious. Let cool.
In a food processor, process the garlic, walnuts, toasted bread OR breadcrumbs, garlic, spices & seasonings until combined. Now add oil and lentils and pulse until coarsely chopped (some lentils should be visible and left chunky). Add the flax or chia egg and pulse a bit more until combined.
Now shape 4 patties with hands and place on a baking sheet lined with parchment or a non-stick mat. Bake at 350F for 20-22 minutes on each side for a total of 40-45 mins. bake time. Makes 4 patties. Adapted from Martha’s Great Food Fast Cookbook from the Blog Oh She Glows.
We topped ours with fresh spinach and ripe tomato. The tomato is a must! I was planning on adding guacamole but they had over ripened. But no worries, we have 2 left for tonight and I am headed to the store at lunch to pick up some avocados!
Our burgers didn’t need the whole 22 minutes once they were flipped. I was being careful that didn’t turn out too dry either. Make sure that you make your patties even. If the ends are thinner they are likely to dry out an burn. Nobody wants a burned burger.
I have yet to find a Vegan & Gluten Free Bread or Hamburger Buns so unfortunately I strayed from my vegan diet last night. One step at a time. I have cut out milk and cheese. Eggs were baked in this bread but I have been cutting them out otherwise. If you know of any gluten free/vegan breads let me know!
I cannot wait to experiment with different recipes after making this one. Of course I will be changing it up and posting new ones for you!
Subscribe to:
Posts (Atom)