I love a good sandwich. There is just something perfect about how you can make converse flavors and textures melt together, tweaking a common known recipe into your own original plated perfection. An email I received yesterday from one of the recipe sites I follow boasted a bundle of “dinner worthy” sandwich recipes to try. As I clicked and became carried away with the mouthwatering, eye-catching icons, I realized I haven’t made a sandwich in a while. I used to express deep devotion to my Panini press, concocting all sorts of beautiful flavors between two slices of bread. Well, I am back in the game, and playing some wild cards in this round of cooking poker.
![]() The BLT
The BLT. Everyone has their own perception of the perfect BLT. My previous 5 card winning hand would have been:
1. Crunchy, cheesy toasted bread
2. Juicy, ripe, thick tomato slice
3. Crispy, light lettuce
4. ‘Special Sauce’ (mustard, mayo…something mixed)
5. And of course, the ace, thick sliced bacon
But, like I said, I am introducing some new rules to the game. I am not going to settle for traditional approaches.
My “BLT” wouldn’t feature most of the natural go-to fixin’s: meat, cheese, egg, lettuce, mayo. Yes, I dealt a hand last night that beat the BLT god’s odds against me.
1. Gluten Free Bread (cheesy and buttery a la vegan)
2. Juicy, ripe, thick tomato slice (for old times sake)
3. Fresh, locally grown spinach (more nutrients!)
4. Dijon Mustard (mayo wha?)
5. FACON
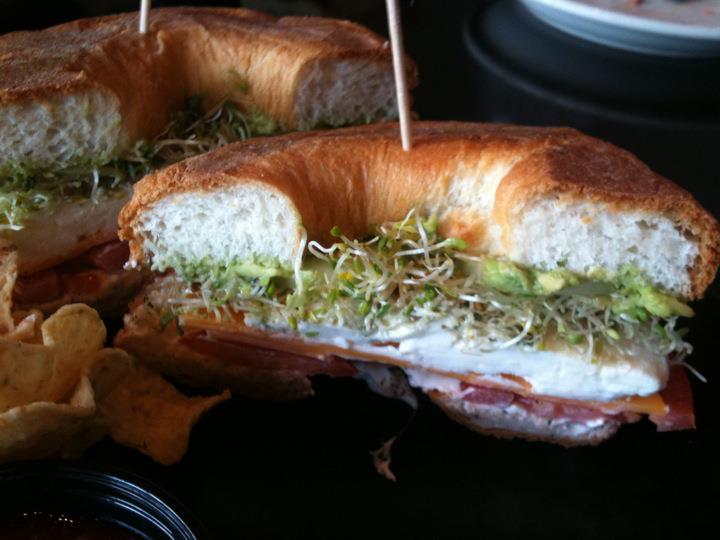
![]() |
| V-BLT. Looks heavenly doesn't it?! |
Um,
FACON? Yes, Facon. Fake bacon. No, not the store bought kind. Those store bought strips strip most of what I like about bacon. Even when I ate bacon I would season to my own liking. I marinated, spiced, and browned thin tofu slices to FACON.
A risky move. Especially with such a long standing traditional recipe. I’ll think you’ll love this non-conformist BLT though, or rather FST? I know I should call a spade a spade but for reader’s sake, let’s try…V-BLT. A vegan BLT. Rolls off the tongue a bit nicer.
V-BLT
Yields 2 sandwiches
Ingredients
• 4 slices gluten free bread of choice
• ½ package extra firm tofu
• 2 tbs low sodium Tamari (gluten free soy sauce)
• 1 tbs Daddy Hinkle’s gluten free marinade OR liquid smoke
• Pepper
• Earth balance butter
• 2-3 tbs nutritional yeast (optional)
• 2 thick slices organic tomato
• ½ cup to 1 cup locally grown spinach
• Dijon Mustard
• PAM EVOO spray (if using griddle)
Directions
Heat oven to 400 degrees F. Place 4 slices of bread on a greased baking sheet. Lightly spread earth balances on pieces then sprinkle nutritional yeast evenly until all coated. (Omit yeast if preferred but it gives it a cheesy taste). Bake for 10 minutes, flip, and then another 10. My oven can be temperamental so I just watch for browning. Remove and set aside to cool.
While your bread is toasting, press your tofu and slice thinly lengthwise. I came out with about 6 slices. Place in a bowl and add tamari, daddy hinkles, and pepper. Let marinate for about 10 minutes.
Heat a sauce pan with 1 tbs earth balance. Dry off your tofu and add to the pan. Brown on both sides until crispy like bacon!!
Heat your griddle to 350 F and lightly grease. You can use a large pan if you prefer, or Panini press. I wanted mine piled high so I opted for the griddle. Lay down your slices of bread and begin layering. On 2 slices layer spinach, tofu, and tomato. Drizzle Dijon on the other two slices and place it on top of your layered slice, pressing down slightly with your spatula. Flip (carefully) after about 3-4 minutes. You just want everything to combine and warm together.
Plate and serve! I made kale chips on the side. Haven’t tried them? Oh, you don’t know what you are missing! Here is quick recipe below. I have my whole family hooked!
Oh, and in case you were wondering, this was the most perfect "BLT" I have ever eaten. The bread was crispy and buttery and housed the most amazing flavors. The Facon? Perfection. Even my husband didn't want to come up for air between bites. This version also cuts a whole lotta calories, another win I would say. V-BLT just earned itself a weekly spot on the week's menu!
Kale Chips
Ingredients
• 1 bunch curly kale, stems removed
• 1 tbs olive oil
• Seasoning of choice
o Sea salt and pepper
o Cajun
o Nutritional yeast for cheesy chips
Directions
Heat oven to 425 F. Tear leaves off the stems into small pieces and place in a large bowl. Add olive oil and massage into kale. Lay on a lighted greased baking sheet with none of them touching. Add preferred seasoning. Bake for about 10-15 minutes or until edges begin to brown.
Plate and serve. My advice, get your hands on some before serving…they go FAST!